
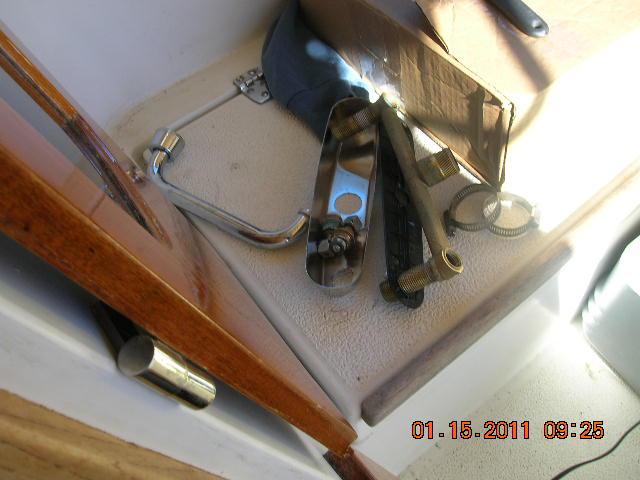
The we started on the galley sink removal. Under the sink.
January 2011 - Marina Cortez San Diego, CA
The reason we wanted to replace the faucet is because it was near impossible to get to it with the loop from the engine exhaust hose coming right up underneath it. So with the engine out and most of the loop out it was giving us good access. Not goo enough to just take out the faucet though. We would need to remove the sink.
The reason we wanted to replace the faucet is because it was near impossible to get to it with the loop from the engine exhaust hose coming right up underneath it. So with the engine out and most of the loop out it was giving us good access. Not goo enough to just take out the faucet though. We would need to remove the sink.
This weekend we decide it was time to start this project as the engine will be getting installed in a couple weeks. As it turned out after removing the sink we think we could have done it with the exhaust hose loop there as we had good access. It would have been harder but doable.


We removed the two bolts (clamps) on each side of the sink. That’s all there were. They came off easy. One was even loose.
Next I stood where the engine was and put a pipe wrench on the drain hose (after loosing the hose clamps) and gave it a tunrn and it came loose. Great!


Easy when there is lots of room to turn the pipe wrench and you can stand where the engine is.
Next we tried to lift out the sink. What were we thinking?? It was not going to be that easy. It was glued in! That was never mentioned in the FOGgers forum. It was said you just remove the sink to get at the faucet. Well fine, that did not seem hard. You just remove the sink. Here we go again JUST and EASY, the words we like to abuse a lot. Well it was not just remove the sink. We had to use a putty knife to get around where we could on the edges of the sink to cut through the glue or whatever it was holding the sink down.

The sink did not budge. We also had to be careful not to gouge the counter top as we are not replacing them. They are dated but in fine shape and we even like them. For the areas that the putty knife would not make it by (faucet and fiddle) I tried to bend the putty knife more with an adjustable wrench. The putty knife broke off at the end. Well that is that for a while.
We disconnected the hose to the through hole at the "T" under the sink and measured the original hoses. We then went to Marine Exchange and go a new thinner putty knife and some new hoses.


When we got the old hose off from the through hole a lot of black hose partials fell into our nice clean bilge.


We looked into the hose and saw that it was deteriorating as we thought. Putting a new hose there will probably eliminate any odor that may have come from the old hose.

1 ¼ inch ID exhaust hose.
9 inches
I got two 9 inchers thinking they were both the same but later after looking at the "T" section I saw one was longer. Oh well. It was 12 ½ inches.
12 ½ inches
50 inches
We got back to the boat and were able to get the new putty knif around the sink even by the fiddle. It was close and the putty knife had to bend a lot but it made it. After a lot of cutting the sink came out. It was just as easy as 1, 2 999999.00 thousand!!!
We got back to the boat and were able to get the new putty knif around the sink even by the fiddle. It was close and the putty knife had to bend a lot but it made it. After a lot of cutting the sink came out. It was just as easy as 1, 2 999999.00 thousand!!!
We took a break.


Now the sink is out and the glue is still there. We removed some by rubbing but will need to find some chemical to remove it. Perhaps turpentine will do it. The underside of the sink will need to be cleaned as the glue is on there a lot.

We went out again and got new drains for the sink. That is something we have been wanting to do for a long time. We also found adapters for the 1 ¼ inch hose at West Marine.

Now that we have looked at the pictures that the hose from the "T" to the drains that we bought is too short. Now we may just get the reinforced rubber hose before those two. Like the kind we got for the bilge pump hose. We will see how it goes.

Now we looked closely at the two hoses from the "T" to the sink drains. One had a rust spot on the bottom side by the "T". I squished the hose (steal re-in forced exhaust hose) with my fingers and it collapsed! Yea the steal inside was completely rotted through. The hose was leaking just a bit from the bottom.


We never noticed. The other was in better shape. So we like I said bough replacements, luckily Marine Exchange just gave us those tow pieces as we now think they are too short. Anyway it is turning out that this is a well worth project for us to be doing and the sooner the better just at a health stand point.
So now the sink is out and we can get started on the faucet.


Lots of glue to remove or sealer or whatever it is

Like the hatches and port holes it needs to be cut to get the sink out
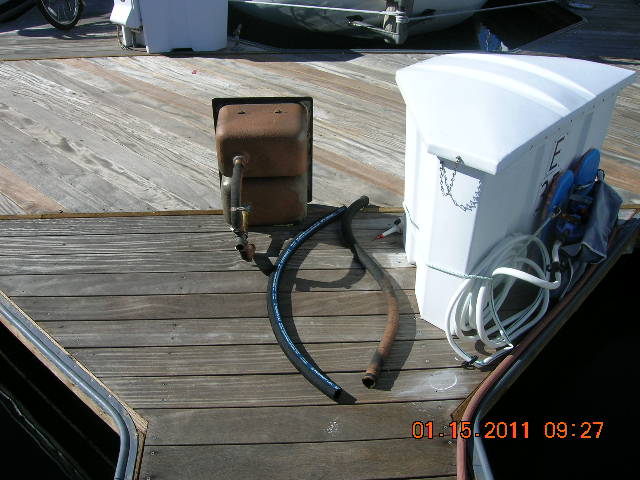
The sink and new 50 inch 1 1/4 ID hose steal re-enforced. It is actually exhaust hose.
But that is what Islander used and we are doing the same.
The old faucet offered no new surprises and came out easy enough (there’s that word again).
To install the new faucet we had to drill a hole into the counter top. We also had to get it right as once the hole is drilled it is rather hard to modify. We measured and re-measured so we would have room for the sink and faucet with the cover piece.

We connected the two water hoses that went to the faucet to each other so we could use the water on the boat.

With the drill bit sticking out

Drilling the pilot hole
You can see the new hole is going to be towards the bow more than the old holes. That means yep you guessed it, we need to modify the old two holes.


Done!
Now we had to put the in the counter top but wait. It does not fit. The bracket that goes into the counter top does not fit into the two old outside holes. The three need to line up. So first we worked with the jig saw to get the holes closer to each other. The two outside holes need to go closer to the teak back splash. Not easy as there is no room for tools. After we did what we could do with the jig saw we used the Dremel and a steal cutting bit. That got us the needed hole size for the template to fit in. I think Delta uses the template to keep the faucet from spinning around because it makes it stable, or we used the wrong set of instructions. They have a few. No matter we got it so the plastic template would fit in.


Now there is a backing plate that goes over the top plastic template. As you can see there is a piece of wood along the back side of the faucet and so the baking plate will not sit flat. We are going to make another piece of wood like that ¾ by ¾ and about 10 inches long so that the bottom plate will be level.
That piece of wood is screwed to the bottom of the counter top and to the wood holding the salon table. We or I thought about just removing it but that table is heavy and we want to leave all the support that is there for it.
So that is where we stand to this point.


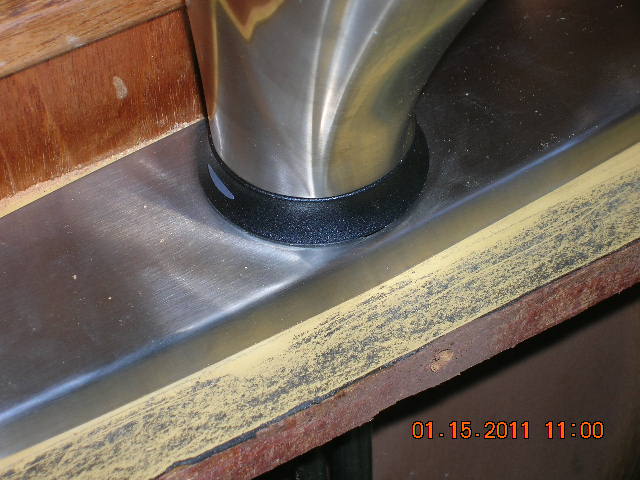
The Delta one touch faucet is designed so the handle is to the side. We were going to put it in with the handle to the front or facing aft. We could have done it but the sink will not go in as it is in the way. There is a little LED light on the front and you can see it is moved to the side because we were turning the faucet. So it looks like it will go in as designed 😁

No comments:
Post a Comment