Calked Cap varnish removal - more

 Used some of the long summer sunlight to get some more varnish removal done on the cap rail.
Messy job...glad when this is over. 

It is kind of instant gratification though seeing the nice teak below the old dark varnish come out.


Refer insulation - freezer insulated!

We got another can of spray foam from WM (our last - yeah!) and put foam behind the Dow Blue Board (DBB) that we added for the evaporator plate to screw into. First we drilled  four holes through the DBB so we could get behind it with the foam.The spay foam pushed the top of the DBB out a bit so it is not exactly straight up and down now. We will need to sand it to make it right after trimming off the excess spray foam.
 That’s it  - no more DBB or spray foam! Both the refer and freezer are done being insulated!


Cockpit grate - Second coat of Teak Wonder

 Got another coat of Teak Wonder on the cockpit grate. I thought I stained it with the oil from my sub sandwich the other day but it either came out or blended in with the second coat.

 Some water from the bimini pooled onto the grate and sat there all day it never got absorbed into the wood.      Looks like the Teak Wonder is doing it’s job.
 Owen will be coming by today to fix the spot over the emergency tiller access port.


Puerto Vallarta Rain - We were on vacation. 2011

July 13th 2011 Puerto Vallarta Mexico

Because the rain comes down so hard and fast those hatches and port holes and the cap rail etc need to get sealed up nice! We were on vacation.
 This video is of Debbie dancing in the rain. It comes down hard but is warm and will not last that long. It will possibly rain for about two hours an evening but clears up after that. The rain cools things down and is fun.

Froli Sleep System - came in

 The Froli Sleep System we ordered came in and we opened one box. Looks like the little crawly things on a SciFi movie.  So now to find some time to set it all up :)


Refer insulation - freezer almost insulated

 The freezer insulation got rimed out a bunch so we could put a one inch thick piece of Dow Blue Board DBB) in and have it straight up and down. This is what the evaporator plate will attach to, well on this side of the refer any way. Debbie attached the spacers that come with the evaporator plate that go between the freezer and the plate to the cardboard template with blue tape. We fit is in until we were happy with the size. Debbie glued it into place and we will drill a few holes in it so we can foam the void behind it and then foam around it. This is the last insulation we need to do. The tops will need two inch thick pieces of  DBB but that is not hard and can be done on the work mate on the dock, no bending and banging the head and far reaching places etc.


Debbie and I replaced the windlass cable ends - 2011

 It was time to put water in the batteries. This is a pain in the ass. It is easy to do - it is the reminding ourselves that it needs to be done and planning it that is a pain.

Wind generator mounting pole dropped off

 Dropped off the mounting pole for the wind Generator at R. W. Little’s and got a completion date of the usual 7 to 10 days. It used to be a month or more but with the bad economy it works for us.
We are having it done like we had the hatches done a three part marine epoxy paint. The color is Sky White. 


Salon forward windows - shade screen installed - 2011

 We installed the shade screen that Debbie made on the two forward facing salon windows. First we had to determine the center so the shade screen would be centered on the window and then we put in one snap. 

Mounting pole for wind generator

Picked up the aluminum pipe – 1 ½ inch ID sch 40 for the mounting pole.
Now we will drop it off a R. W. Little.
TEL: (619) 297-3705

R.W. LITTLE CO. INC. 
3923 PACIFIC HIGHWAY
SAN DIEGO CA 92110 


Cockpit table - Starboard

 Debbie picked up some ¾” Starboard from San Diego Plastics
sdplastics.com (800)925-4855 (619)477-4855


This is going to be used for our new cockpit table.

MPD-717
Folding flush-mount table hinge


 We order the hinges form Marine Parts Depo

When we get the hinges we will drop them and the table top off the C. S. Ferguson for him to router uo spots for the hinges and make the cuts for the two wings. Then we will re-fit and make a template for the top part of the binical and send it back for more and cutting.
 We also need to fabricate the top bracket that holds the current table so it will go on the binical on the outside of the 1” supports instead of the inside and then fasten new hinges to it. This is the old “Yacht Specifies” binicla and the SS supports are further apart than the new Edison binicals.
Ahhh it is never done is it 


Caulked Cap varnish removal

Got some more varnish removal done on the cap rail. It has still got a ways to go but we are making good progress. 


Sunscreen covers - two forward facing windows - 2011

Debbie made new Sunbrella sunscreen covers for the two forward facing windows in the salon. These fit good and will help keep the sun from beating down onto the teak and upholstery and into the boat generally heating it up. Now we will install the snaps which is always the hard part. That and drilling holes into the boat. We are thinking three snaps on each end should do it. Ouch!

Hanging locker door- holding hooks

Made up a couple of plastic hooks with small bungee cord for holding the hanging locker doors closed. These are the alternative to us putting on hooks and eyes for doing the same thing. We like this as they do not add more “stuff” to the wood. If we get into some heavy seas this should prevent the doors from opening, if they do they will not bang anything but closed. The bungee is just tight enough to not slip off.


Wind generator mount

 OK we picked up our wind generator mount form Benchmark Custom Welding and then went to ME and got bolts and nuts and lock washer. 

There it is sitting on the dock with a tether tied to it


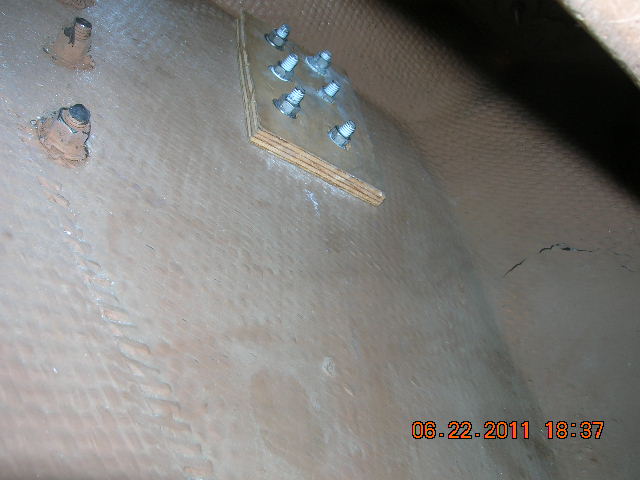
We made a backing plate from some ½ marine plywood and then were ready to go.


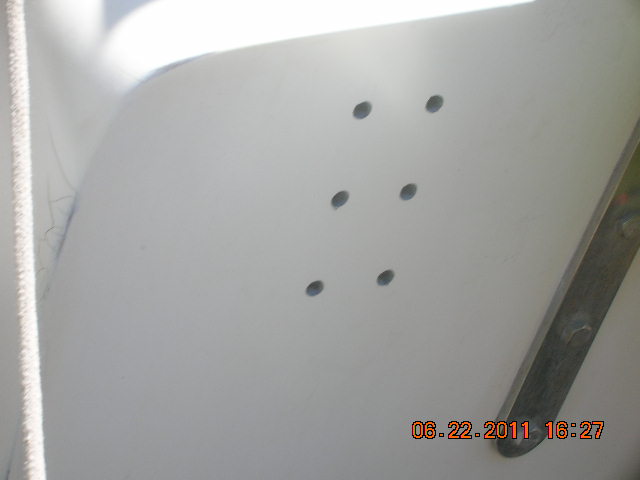
After a lot of fitting we were ready to drill the wholes. Six of them, lots of hole in the boat again. 

Debbie made a template from brown paper and taped it to the boat.

Opps no 3M UV 4000 form bedding so Back to ME for that.

Now we drill the pilot holes and then the right size wholes


 Then some clean up with Acid-tone so the bedding compound 3M UV 4000 gets a good grip. 


All those holes are scary looking!

We angled the mount so we could get the pole to mount straight up and down as best we could.

OK now we are ready for the mount installation. Debbie applied the 3M UV 4000 to the stern and mount and slid through the first bolt. I put the backing plate on over the bolt and oh sh.. the bolt is too short. Dam, it does not go through the backing plate. Only to the edge, I can feel the bolt but there is no room for a nut or washer. So we wipe off the 3m UV 4000 and clean up. Another trip to ME for longer bolts.

OK NOW we are ready to bolt in the mount!  

We do a test bolt first 


Debbie did the 3M UV 4000 application and held the bolts with the wrench as we tightened them alternatively several times as we squeezed out the 3M UV 4000 and got the bolts tight. I was reaching up and under the stern lazerett with my longer arms. All went well.

 We had the mount made with the rubber mount bolts 8 1/4" from center to the end of the mount. That way the pole would clear the bimini but not be too far astern. 

 We used the same template that was used for the outboard motor mount after we tested to be sure the stern was the same angle at this point.

Backing plate with bolts and nut and 3M UV 4000 to  lock it all together

Notice there is no backing plates on the back stay bolts, we over build every thing but that's OK it will never give us a problem!


 All done an looking good! Still needs a little clean up of the 3M UV 4000 and ready for the pole!
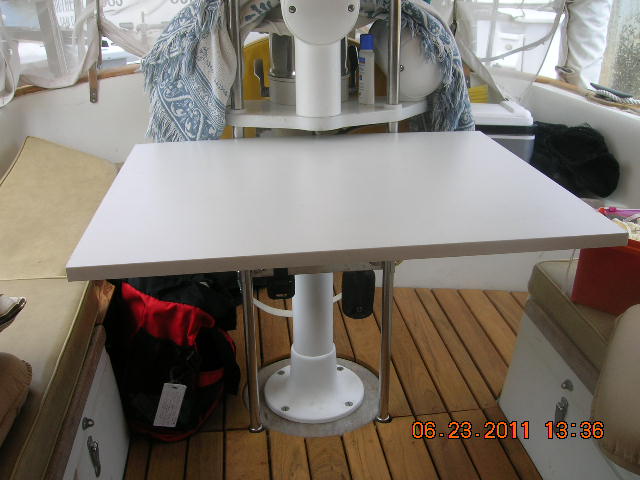
 Now to make up a pole!