November 2011 - At Marina Cortez Harbor Island, San Diego, CA
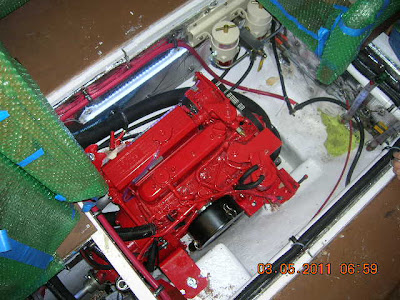
Good progress on the Beta Marine 38 hp engine installation. Phil had told us on the phone that he decided to put the water muffler in front of the engine instead of up behind the engine on the port side where it was originally.
So of course our minds ran with that. The old location sucked because you could hardly see the muffler, never mind work on it. However it was out of the way. Where in front of the motor would it be etc etc. We went to the boat and the muffler was in front of the motor but nicely put into the top bilge area. We like it because it was out of the way yet if something goes wrong you can see it and get at it.
The old Racor fuel filters. were on top of the sink through hull and that made getting to the lower bilge a bit of a pain. Good access for the Racor fuel filters but not so for everything else. Workable but still kind of in the way. He put the Racor fuel filters in the upper port forward section of the engine room. So still good access but also out of the way of the lower bilge and sink through hole valve.
Debbie said
Debbie said
Best surprise
Water
Best in show
Also
All new fuel lines
All new exhaust lines and through hull
New sea water strainer
The loop under the sink Phil put behind the faucet so we could get at the plumbing in case we had problems with it. Also he used a nifty fiberglass loop fitting we had never seen before.
Phil also put a loop in the lazarette for the exhaust hose by the through hull fitting.
Better access
Black 2 inch hose goes to water muffler
A piece of the 2 inch water muffler hose
Missing second alternator - can see new motor mount
Water muffler with hose going under motor to exhaust
Loop under sink,well the sink is out😁
Hose going under storage area to under stove
Loop in port lazzeretti.
Rear motor mount.
New bronze Groco 3/4 in. Raw Water Strainer ARG-750-S placed by shower sump


No comments:
Post a Comment