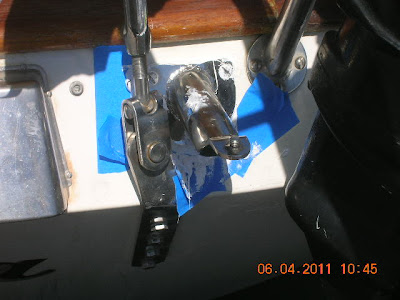
June 2011 - At Marina Cortez, San Diego, CA
We moved every thing in the cockpit out to the fore deck.
We used 3M4000 UV Marine Adhesive to seal the bottom mounting plates to the transom.
We used 3M4000 UV Marine Adhesive to seal the bottom mounting plates to the transom.
Holes drilled.
Bracket installed with 3M4000 UV Marine Adhesive.
Cleaned up some.
We used flat head screws with lock nuts and the backing plate. The flat head shorter screws worked fine with the mounting plate even on the bottom screw which looked hard to install.
Note:
Later in Puerto Vallarta Mexico we removed these mounting brackets and had them made longer in a davit refit.
Later in Puerto Vallarta Mexico we removed these mounting brackets and had them made longer in a davit refit.
There is a stern windlass in the port lazarett so that made installing the backing plate real challenging!
We took the drum off the windlass to help us get up and under. We greased the windlass while we had the drum off.
We then put a swim noodle over it so it would not gouge us.
We use some weird body configurations to get the nuts and plate on.
A dock mate Rodney came buy as we were contemplating installing an access plate into the back of the stern port lazerett. He was able to get up under with his body more upside down. With this new revelation Debbie was able to follow on the other side. We spent a couple few hours on this job alone.
There is enough room to have an outboard motor on the stern rail. Even a four stroke outboard would fit there. It may take a little modifying on the motor mount bracket but we can make it work. The motor will not rotate as the throttle handle will hit the davits but it does sit on the stern rail for storage which was important for us.
We got the mounts behind the back stays so we could move them inboard and couple inches also.
When we had the ends cut off the bottom and the davits re-welded the welded made one slightly different than the other. This can be seen in the stern rail mounts of the davits in height. Not much but it is slightly noticeable. He also put new ball ends on as one of the davits ball ends was cracked.


No comments:
Post a Comment