
First off we
installed a strap over the West Marine to prevent it from moving side to side and from
bouncing up and down in heavy seas.
We did some good water heater (WH) work and solar controller (SC) work.
We re-plumbed the water heater so that the hoses are out of the way as best as possible. We also set up the hose to the galley sink foot pump with a valve. This did not get done because it was 2:30 PM when this all got finished and I started at 8:00 AM which means I ran out of gas and hose. It would have required a run to Marine Exchange for more ½ hose and I said a Jacuzzi and steam bath seam better at this point. But now I am ahead of the story.
We have not yet screwed down the front
mounting tab but will do this shortly after we finish the wiring.
We then ran the white #10 25' wire to to solar controller in the back of the nav station through the engine room. While doing this we attached it to the old 2/0 cable that was still hanging around from the nav station to the battery bank. That is why we left it to help snake this wire through. So when we got the wire through we threw away that old cable. Then put a #10 solder less terminal end on the water heater side and screwed it into the 12v part of the HW element.

Across the stateroom
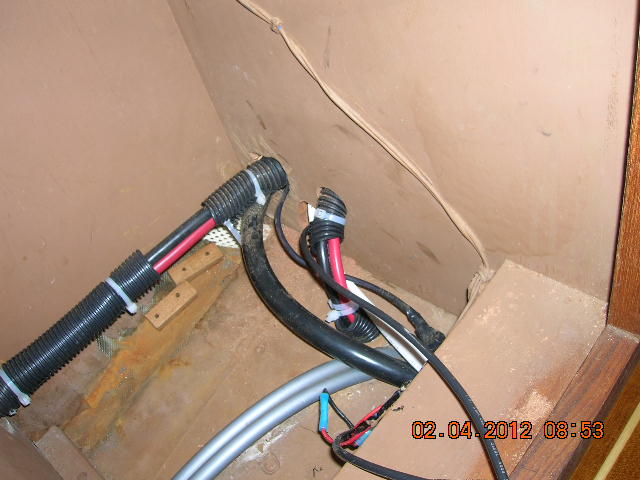
In the cabinet

The cabinet
Then we ran a #10 black wire about 20' to the negative buss under the settee putting a #10 solder less terminal ends on both ends. Screwed this one in and that was done.

At the same time we finished running the 120 volt 10/3 wire from the nav station to the HW heater.

Of course this all meant tearing the whole boat apart for access to everything.
Next we added the SC battery heat sensor to the house battery bang and ran the wire up to the BlueSky Energy inc Solar Boost 3024iL DUO solar controller.

We then went to the SC and and I think for the last time. These wires and jumper change will be the last time we will need to go into the SC. Yea!

Not a lot of space to work with here.

OK added the dump load (WH) #10 white wire and the battery temperature senor wires.

Set the #4 jumper to ON.

All done

It is reading 16.7 amps
This will send up to 25 amps to the HW heater.
The batteries a almost fully charged so most of these AMP's are going to the dump load WH.
Remember it is February 4th so the sun is low but it is sunny. Around the high 60's.
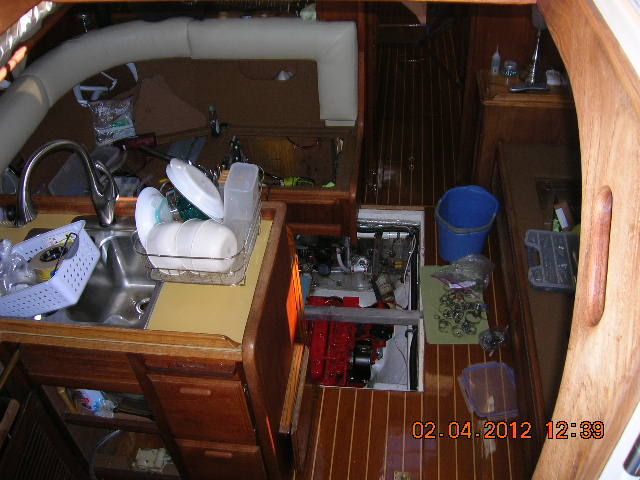
Ok now to the plumbing.

Got the cold water plumbed.

All done.
Added a couple bronze T's and it seems like a nice flow. We also are trying to get the plumbing out of the way so we can install the new Mermaid 12,000 BTU AC for the stateroom. It needs L - 19.75" x W - 13" x H - 13.75" of space.
Also there is an electrical box for the unit that needs to go here. And add the Garmin buss in here and you can see we need all the room we can make.
We still need to wire up the 120 volt and install a few screws etc but for the most part this re-plumbing is done.
So we have a new HW heater and new plumbing and new wiring.
On Sunday we we only using solar for HW and at around 2 PM it was almost too hot to hold you hand under the HW. This is February 5th and the sun is still low in the sky and it was 70 deg at best. In the months to come this will be some HW! Now I have to admit I was quite skeptical about this solar HW but it is working great.
At night now there is no making HW and if you use it the cold comes into the tank diluting the HW. It is OK for me using my Water Pick and for washing the face it is just right. Getting grease off the dishes will just have to wait till the morning sun, gee too bad 😌
No comments:
Post a Comment