
New duck bills for the TW Holding Tank Discharge Pump.
Our macerator bit the dust about a month ago. It was making some awful noises and not pumping. Our new one we purchased is a diagram pump by SeaLand Dometic. It is a real nice pump(TW Holding Tank Discharge Pump) that we picked up at the Chula Vista Marine Swap Meet.
It is that time for TW Holding Tank Discharge Pump maintenance, so we
went for it.

First Debbie cleared the bed not that easy.
Because we had a lot to do we completely cleared the bed instead of just the hatch.

The board inside the space goes against the holding tank but there is work to do so we have not put it into place yet.


We also decide to remove some sound insulation. If we decide we need it we can replace it.
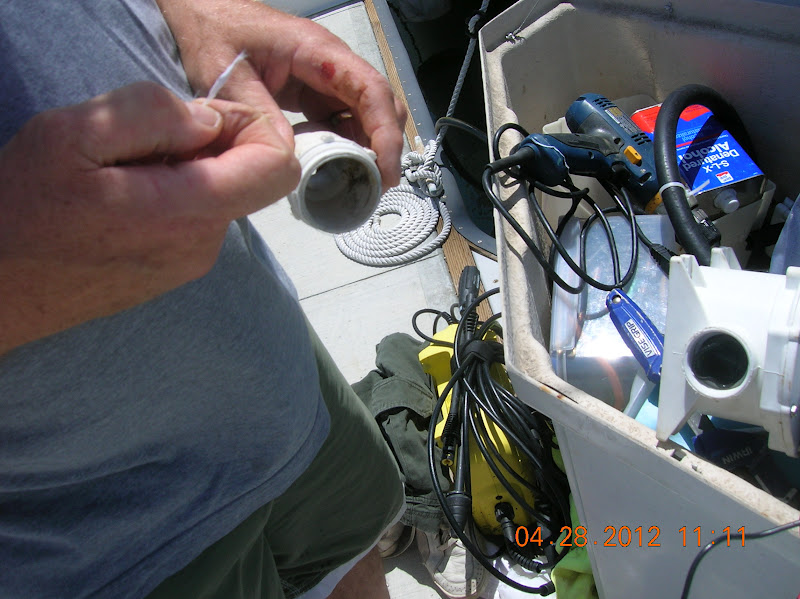
Next was to remove the TW Holding Tank Discharge Pump(macerator). Because we wanted to remove the hose from the macerator to the 1 1/2 inch through hull valve we removed the macerator.

One duck bill was worn out and this side was sucked in backwards.

We were able to clear it out of the TW Holding Tank Discharge Pump.

This was jammed under the bellows.

You can see the bellows part of the pump inside.
We then tested the TW Holding Tank Discharge Pump with some test leads and it worked fine.
Wereplaced the plumbers tape on the threads of the pipes and put the duck bills in. The both face the same way.
On the side with the larger length pipe molded into the housing the duck bill goes in.
Now I should mention getting the TW Holding Tank Discharge Pump out was not with out its dirty side. Pulling the hose's off spilled poo all over.

My pants and shoes in the soapy water.
Because the hose to the through hull had such a big loop in it (I put it in) there was lots of poo to come out. It spilled all over my shorts and shoes. My arm etc. The second hose was not so bad.

We decide to drill a new hole for the hose to go to the through hull valve. This time th ehose will go the same height our lower than the macerator. The next time it will be easier or cleaner removing the hose.
There also will not be so much poo sitting in the big loop.

So the macerator is back together and now it is time to remove the hose to the through completely.

You can see how big the loop was.

The hose still attached to the through hull.
There is a reason we wanted to remove the hose from the through hull valve which has a curved bronze fitting on it. When we installed the hose we heated it and it only got on the fitting a little bit before the hose refused to move any more. We tried cutting it off and doing this again but the same thing happened. We were tired and beat up from the days work so we put a clamp on it and that was it. The hose clamp barley made it onto the hose and fitting. We figured at some point in time the macerator would get turned on before the person opened the through hull valve. This would blow the fuse but the way the hose fit on the fitting it could very well blow the hose off the fitting not blowing the fuse and spewing poo all over the inside of the salon bilge are. What a mess that would be, no thanks.
We went to A - Z marine and picked up a Dometic elbow and threaded fitting. We glued the PVC together and decide when we would put that fitting on and the hose would slide on nicely. They do work really nice. A fer discussing this issue on the Salinet forum it was pointed out that we should heat the fitting up then the hose and then push on the hose.
That is exactly what we did. Of course we had to cut the hose off the through hull fitting, not easy then cut the hose to length and do the heating. Oh we had to mop out as much poo from the fitting as we could with a rag. Hot poo you know etc.
We heated the fitting till it was sun hot then, went to the hose and heated it up being careful not to heat to far or too much. It went on nicely as I was sweating it would not screw up. Taking that fitting off would not be an easy task in the tight space and it was on real tight if this did not work.

Hose with hose clamp off just barley on fitting.
It is also deformed because I over heated it.

The mark was where not to heat past. All done and double clamped this time!
Now we snaked it through and then cut it to length. It took a few cuts and it was still too long. no joke.
It is still a bit long but I was wore out so it is fine. It just rubs a bit against the hole we cut. We can chafe protect it.


The old shower sump through hull is on the right.
Way to hard to get at so we converted the old macerator through hull to it and added added a 1 1/2 inch through hull for the macerator, the correct size for the TW Holding Tank Discharge Pump(macerator).


This is the amount of the loop we removed.
One of the side projects:

Shower sump hoses running up under bed by hull.
The white hose is the gray water our from the shower. The clear hose is the shower sump vent.
As you can see the we ran the shower sump breather hose up through the locker and attached the shower gray water out hose to it. We first had to drill a hole for the shower sump breather hose.

Buss need removing and wires re-run and secured.


We did get the 10/2 wire snaked up by the dorad hose to the ResMed CARP breathing machine I use. This will connect to the DC power supply for he ResMed CARP machine and to the blade fuse block in the head. This way I can use the machine while at anchor at night. The wire is run to both locations now but needs to be connected at both ends yet. Still the snaking of the wire was the hard part and it runs under the bed so it was a project waiting till we climbed under the bed to finish.
No comments:
Post a Comment