We attached the new brackets from Kato Marine to the new welded bottom of the brackets.
We got the dingy davits set in place, we did a lot of adjustments and then slept on it.


First thought


We duck taped them to the stern rail at the bottom.


The next day we decide to move them inboard some.
That way we could fit the outboard motor on. It seems a good fit so we slept on it again.
Then we decide to go ahead and drill the holes and size up the screws for purchasing.

To do this Debbie went below into the lazarett


Debbie searched out the spot for the brackets with her left arm.

Debbie was looking to see also if the backing plates would fit
The area was clear of any issues that would prevent us from drilling through.

Drilling first whole


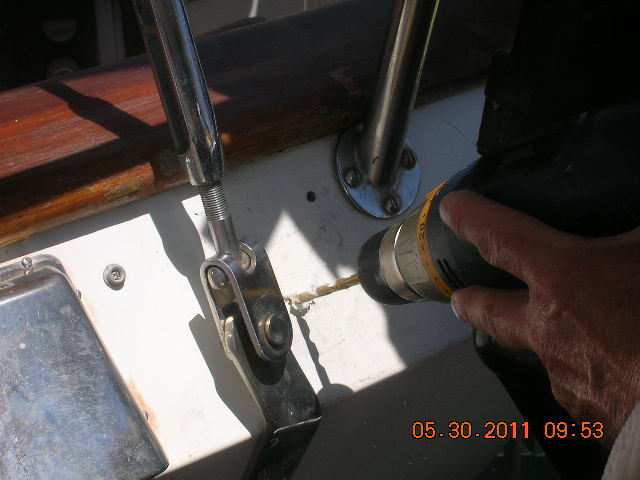
And another whole


Last whole, we marked them off using the backing plate, a Debbie idea that saved us some work

Sizing for the length of the screw wholes. Need to get the screws the right length, that mean Debbie had to go back into the lazerette : )


 OK one side is set up for final install. We still need to get the real screws and then bolt them in. That will require yet another trip into the lazerette for Debbie!
The davits look straight but being nothing on the stern of the boat is straight up and down it is a bit hard to tell.
We could have moved them inboard another 1/2 inch. We had that much clearance. That so far is the only thing we wish we had done. Not a big deal but every bit of room for the outboard does matter.
Next the other side.


A couple temporary screws in to hole this side in place

The davits look straight but being nothing on the stern of the boat is straight up and down it is a bit hard to tell.
We could have moved them inboard another 1/2 inch. We had that much clearance. That so far is the only thing we wish we had done. Not a big deal but every bit of room for the outboard does matter.
Next the other side.
No comments:
Post a Comment