What happened is the VacuFlush J-Series Vacuum Generator stopped making a vacuum. So no working toilet. Again we had to dig out the porta-potty! Next day we took apart the toilet and found nothing wrong. We cleaned the parts and then took off the hose to the J-Series Vacuum Generator. We did find some deposits of hard water we broke off and cleaned the hose and fitting to new condition.
Then we removed the hose from the J-Series Vacuum Generator to the holding tank and snaked it out. Messy job as you might think. Nothing clogged there. Then ran tried to make a vacuum by turning on the electric motor. I put my hand on the bellows as we removed the two flappers from the outside of the J-Series Vacuum Generator. It did move up and down. Then we put new flappers in the J-Series Vacuum Generator. Then we tried running the J-Series Vacuum Generator tank without the out hose connected but nothing came out but some spray. We did notice how dirty the J-Series Vacuum Generator bellows were and decided to take it all apart another day and clean it up.
We have been using this VacuFlush system for six years now so it could use a good cleaning up.
The VacuFlush support is closed until the 5th of January so no help there. We were hoping we would not need parts we do not have for backup. Also we are in Zihua so no place to get them. This took all day. However no go, still the not a working toilet.
On to cleaning out the bellows.
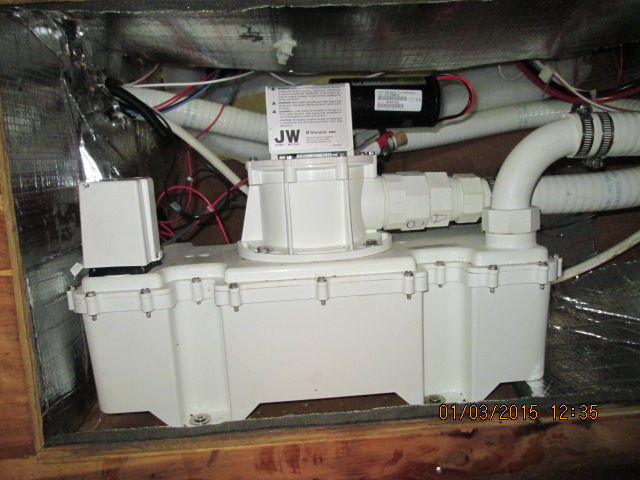
After a day or two we tackled the removing of the J- Series Vacuum Generator pump and housing.
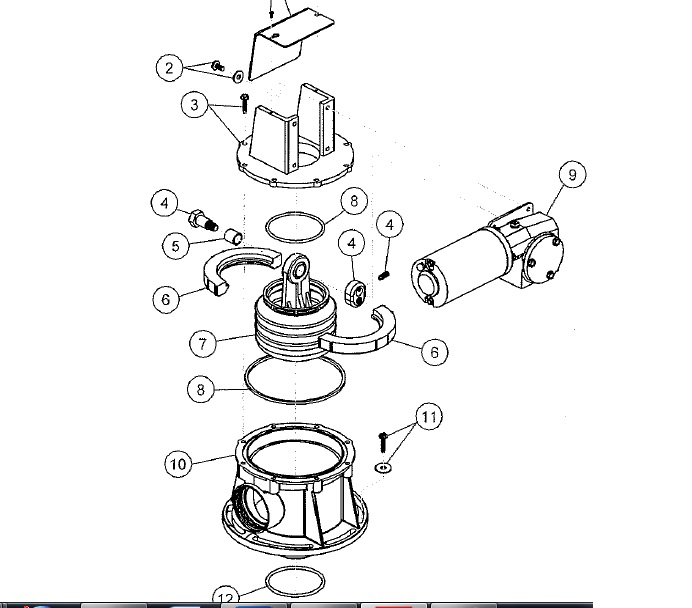
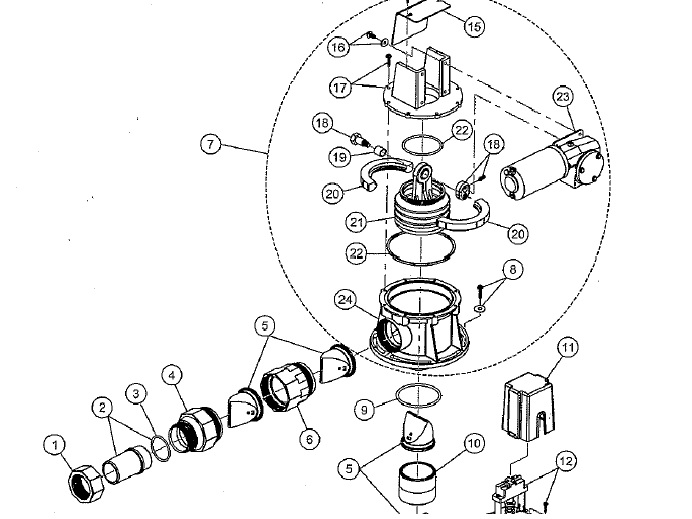
J- Series Vacuum Generator - (Pump Detail) VacuFlush
J- Series Vacuum Generator VacuFlush
The bellows are inside here.
You're looking at the bellows which moves up and down by the electric motor.
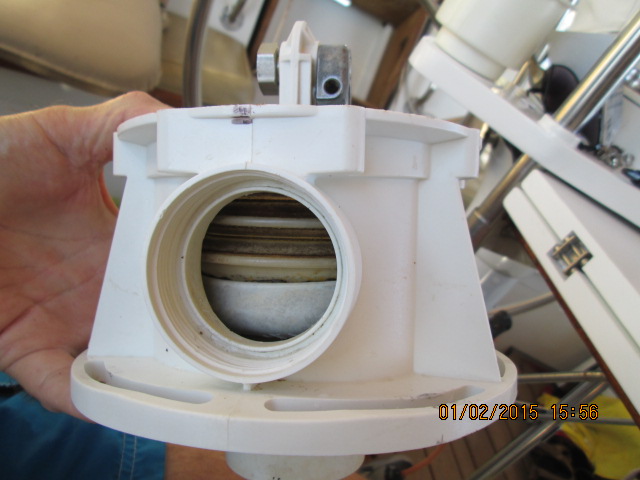
Inside the "J-pump body" is where the bellows sits and does its work.
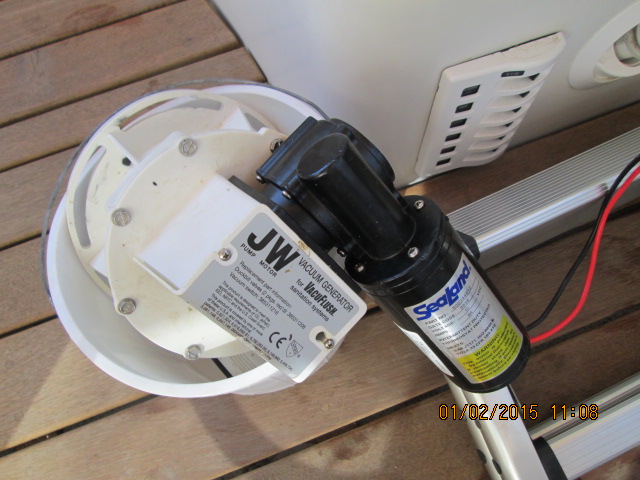
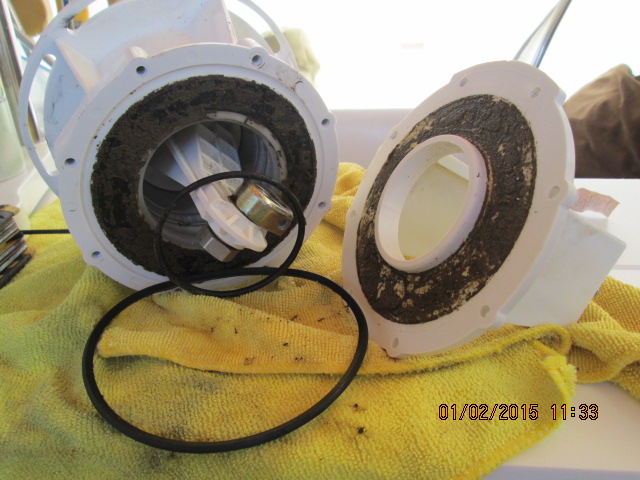
Once we removed the "Top Closure' which holds the motor the two O rings came off.
We removed the socket head set scew and the bellows disconnected from the pump.
The electric motor housing is just dirty.
It is good to put the O ring on the top first and then assemble it as it goes together that way, if you put the O ring on the J-pump body it does not seem to assemble for some reason..
Then it took some gentle pryng with a flat head scew driver to get the two black "Bellows Clamps" and bellows out of the J-pump housing. Once out we soaked the whole mess in a bucket with CLR - half water and half CLR. After a few hours the two Bellows Clamps came off the bellows.
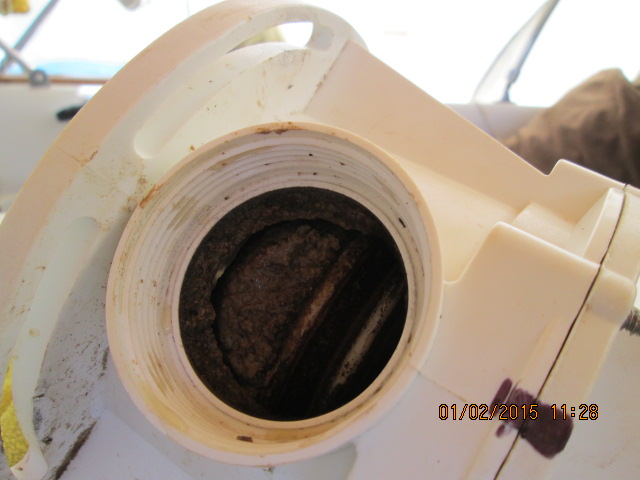
The bellows and the housing were hard to clean up. The material that was stuck on them was like cement. The soaking helped but it also took using a knife and screw driver on the bellows to eventually get off the hard water and waste material.
The housing was the harder. It was hard to get inside with a tool so we used a Dremmel with a SS bit on it to grind out the cemented pile-up of material. We had to be careful not to damage the plastic housing but it all worked out.
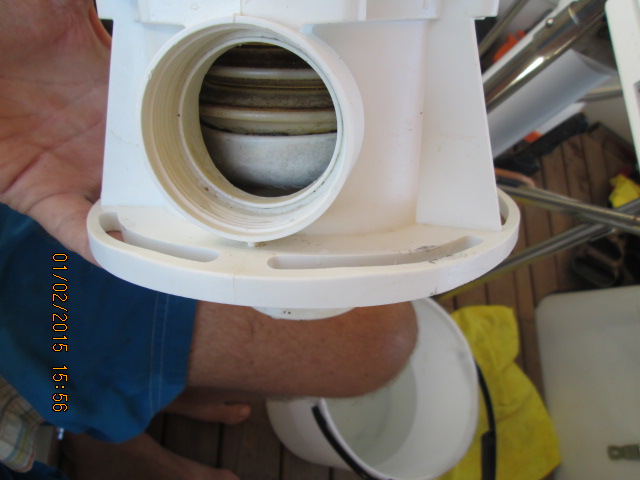
I am holding the J-pump body and you can see the newly cleaned bellows inside it.
J- Series Vacuum Generator - VacuFlush
This cleaning process took a whole day.
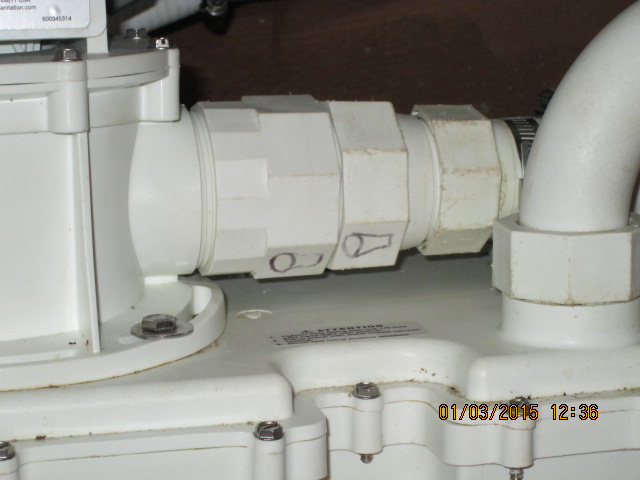
Debbie had drawn pictures of how to replace the flappers so we
did not need to look it up each time.
OK all cleaned up and there was no broken parts! Another fix done
at anchor and it is now working great!
We have some ideas for this summer. We will replace the hoses of the VacuFlush J-Series Vacuum Generator to the holding tank and toilet. We will get some hose fitting spares. We will create a holding tank by-pass system. We do not need to use the holding tank but when we are at Paradise Village Marina in Banderas Bay Mexico because they are the only place we know of that has a working pump out. (Well La Cruz but you need to take your boat to it. Not likely when you're dug in for the summer!) Anyway we will not need to re-build and replace the poop filter or add any chemicals or macerate by by-passing the tank while cruising. We will also remove and dis-assemble the vacume tank and clean it out.


No comments:
Post a Comment