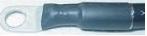
Wire for blade fuse block

 Order the wire for the Blue Seas fuse block and fuse block fuse.
bluesea.com/    360 738 8230
Kinda over built it but whats new.

 This is a estimate with all devices running at the same time - not likely but that is the way it is done. Also with all using 5 amps - not likely ether. 

Ordered at genuinedealz.com


Cable calc http://shop.genuinedealz.com/Store/Tab.aspx?tabid=2


There is a beta DC circuit wizard at Blue Seas under tool also.

Built with 4awg wire 

14 4 feet with 3/8 to #10 black

11 feet 3/8 to 5/16 red to 80 amp fuse 

6” 5/16 to #10 from 80 amp fuse to fuse block

32 estimated feet over all that includes the runs from the buses to the batteries etc.

4.6 voltage drop

 Thats close as a 10 percent drop is OK for non critical items
3 percent for critical circuits.


Typically you fuse the wire at 80 percent of max load.

80 amp fuse to fuse panel
Estimated usage of 36 amps total all running at the same time or 5 amps per fuse - more than will need

Devices such as:
Bilge alarm - 1 amp fuse
Propane detector – 1 amp fuse uses less than an amp


Sailing 110610

Debbie, Joe and I went sailing on Saturday.

Don and Jan on Grasshopper
The weather was for partly cloudy skies and 10 knot winds, so you know prepare for 20 knots.
The swell was 5’ at 13 seconds and we sailed once out of the harbor as the wind was on our nose, coming from the south. Once out of the harbor we sailed towards Coronado and then along to coast to the IB pier. The sail was nice and somewhat downwind till we turned towards the IB pier. Then the wind started to pick up and it was a steady 15 knots with gusts to 18 or 20. The wind seemed to hold steady the rest of the day at 15 knots. The wind chop started which added a foot or two of wof wind chop to the 5’ waves and it was a cross wind chop so it became quite bumpy a ride.

Don & Jan on Grasshopper


Don and; Jan on Grasshopper
 Once we came about to head back be were bouncing around a lot se we headed to the esat side of the point so as to get some shelter from the seas. I worked so-so because the swells were coming from the south so right into the harbor. It did help some though. Joe and I played some guitar and we all had a nice time. 


Heading back

An Islander Freeport 41 coming out of the harbor


http://www.svbigtuna.com/


Big Tuna


I looked at their web site and yes they have done a ton of work.
They are the second 41 that I have seen with the instant propane heater in it for hot water.
We are sure interested in doing that. A little more difficult on the 36 for space reasons but still doable.
Got to wonder about insurance. Ours said NO unless it was mounted on the rail, yea right that will happen.
Maybe if we decide not to insure at a later date while cruising?
We need a dad like Big Tuna has to put in a floor and double bunks and, oh wait, I am the dad, darn. J

Another beautiful sail in San Diego.

Sold Perkins

The Perkins is SOLD.
FYI
 We were advised to ask $1800.00 for the  Perkins if we have time. Seeing as we are on a rather short string we dropped the asking price to $1500.00. In retro spec we should have asked the $1800.00 as we had two buyers right off the bat. We only advertised on our blog and on San Diego Crag’s list. So we obviously did not advertise in the LA market or anywhere or anything else.
 We included the Borg Warner trany and the electrical panel and exhaust system etc. All things that go with the engine to make it run.
We have received a deposit and of course are not assured of anything till it is out of the Freeport and the rest of cash in hand but it was quick and rather painless.
 In our market research a rebuilt Perkins goes for about $3500.00 and that does not include the tranny or exhaust or any other goodies which we included. Our Perkins also does not need a rebuilt as it runs fine with a 1000 hrs on it. So it was a good deal.
 I have heard of the tranny alone going for over $1000.00.
So that’s our experience so far with our re-power of our boat.

Calked Cap rail

We caulked up the cap rail once again and once again I thought it would be a quick job which turned into hours. It did not come out nice looking as I did the caulking not Debbie but it did seal up nice I think.
 At a later time we can trim it up and once we varnish the cap rail it will look just fine.


Debbie said the winch is wrapped for the holidays!


Head cabinet door

Today I put a coat of polyurethane on the hinges for the cabinet in the head. These are the self-closing ones we got special order from WM. When we got them there were two different hinges in the box. After returning them and re-ordering them they came in correct. Or should I say they came in with the two in the box that we wanted. A few days later while getting some screws we saw the same box of mismatched hinges out on the rack for sale. Well so much for quality control at WM.


 We fit them and they seem to be almost the exact same ones Islander put on thirty years ago. So no fill and drill which is good because on these there is tension as they are spring loaded. They are just enough differently to make the door sit higher. So when installed the door does not open. It hits on the inside edge. Today I sawed off the edge and ran some 80 grit over it.
Now for another fit but fist one more coat of polyurethane on the hinges.


The Delta Touch?

 I am thinking the Delta Touch deltafaucet.com/ would be the way to go for us. They use a couple AAA batteries and can work without using the touch. They have about everything we or I would like for a faucet.
The faucet has a water saving feature and a pull out spay nozzle and some more cool stuff. Like cool stuff!

Also comes in SS

Ordered Propane hardware

Ok just ordered the propane two stage regulator from tweetys.com  and a cover and a mounting bracket for the propane locker.


Ordered more cables

Just ordered some more of the 4/0 marine battery cables.

 An 11’ 4” black cable with both ends being 3/8 for the charger/inverter to the 600 amp buss negative side

An 17” red with 5/16 on one side (battery) and a 3/8 on the other side (fuse)
And a 1’ 3/8 on both side. Goes from 400 amp fuse to 600 amp buss

All from genuinedealz.com

Propane locker, need regulator - 2010

November 2010 - At Marina Cortez Harbor Island, San Diego, CA

 One night this week we did some work on the propane locker in the garage. Now we are at the point where we need a regulator so we can do the fitting with the tanks inside the locker. I’ll buy one on eBay, got a couple items on eBay for sale now. So when one sells I’ll buy a regulator. You know the kind that automatically switches over to the other tank.

Shade screen re-fit for the bimini - 2010

Our shade screen for the stern of the cockpit was originally made for a tent type cover we had made for the boat. Then we got a Bimini. The shade screen did not fit the fasteners so we put some new holes in the shade screen and bingo it worked. It just looked funky.

New galley faucet? - 2010

 We would like a new faucet for the galley that does not get water on the counter top when your hands are wet while using the faucet. To that end I have been researching them.

90 Degree Drill

 My wife bought me a around the corner drill. Yea I know it is not really for around corners but it going to work for what we need it for. We need to drill a couple through holes in the hull. Yikes! Yea and this will get into the spots needed. Also is is great for those hole saw places that the drill is too long for.
3/8 chuck with key.


labeling wires

 Debbie and I started labeling all the new wires that we are putting in. So far not many but we will be ramping up on this soon.

 This shows two in the chain locker (fuses) that we labeled. We are switching over to blade fuses. We have about a half dozen or so glass fuses we installed so far and will be converting most of them. Most are for the head and VacuFlush toilet which we plan on re-doing the wiring. We are going to put a blade fuse holder in the head in the cabinet behind the toilet. Now they are under the bed and I have realized that is a bit hard to get at. Besides the buss under the bed is possibly in the way of storing our 4 hp Mercury 2 stroke engine there as a spare.
 We will put in a 6 blade holder which we have already purchased.
This one is a 12.

Laptop to nav station

The computer has been moved to the nav station. The idea being that we need to start using it where we will be using it in the future.  There will be a new laptop in our future but this one works fine for watching movies etc. We have it hooked to a 19” flat screen monitor which we use to watch movies and some speakers. It works good for now, movies need to be on a portable HD or a DVD.. We have gotten a lot of construction materials off the boat now and the boat has become more livable, or comfortable as we are not living on it yet.


Bora fan for the stateroom

 We purchased a Bora fan for the stateroom. It is just like the one in the head only this one is black (the head one is white). This fan will be placed on the piece of teak we had made to cover the hole in the wall. It will go where the original light goes on the Freeports. We can also use this fan to size up another piece of teak for the salon. There is another hole there. We are going to put another fan there so we can use this one for positioning and then get a piece of teak made.

Traveler and companion way hatch

Finally staked down the bolts that come out of the bottom of the traveler.
We removed the companion way hatch.
We used silicone and a paint stirrer with a piece of coat hanger taped to it. It worked great.  
Replaced the companion way hatch.
Now we are ready to put back (screw in) the teak wood that holds the hatch in place. Well we need to sand it more so when we screw it in place and put in the teak plus and sand them it will be all the same shade of sand. So we will need to do it all at the same time. Sharpened the chisel and am ready, we just need the time.


Phil came by for tranny ratio

Saturday Phil from Beta Marine “The Marine Man” came by just as he said he would. The people he has worked with said he would show up when he said he would and so far that has been the case.
  He had us start up the Perkins and I think he used a timing light to get the transmission ratio. He will be ordering our new Beta engine this week.
 He also said he was just finishing up a Beta engine installation on a Tom Tom sail boat and if we wanted to come by and hear it run we could. So we did. The boat was at the Silver Gate YC and we know some sailors there. Any way the motor looked good and sounded nice and quitter than our Perkins although it was kind of hard to tell because it was up higher and we were right next to it.
 The Tom Tom has no standing rigging and has carbon fiber mast that look like telephone poles in size.
Quite advanced for it 1980’s time.

 Philis step van.

Zipper lube purchased for our boat load of zippers - 2008

Finally we (or should I say I with Debbie’s help) remembered to get some zipper lube.
Some of the zippers in our head liner still work. Also, we now have some in the dodger and this stuff will help keep them working.  Some people I am told us McLube on them. We chose the zipper lube at West Marine.

New SS cleat installed

 Boy does the SS cleat look nice. We re-drilled the holes ¼ to 5/16 in the deck for the cleats. Also drilled the teak blocks. We bought new fasteners and installed one. They work well for the winch. The idea being that the line on the winch is not for holding the jib sheet. The winces are not made to hold the line after the winch cranks in the sheet. Especially at the top. This can cause damage to the winch. So the scenario is to have a couple wraps or three around the bottom of the winch then have it tied off to the cleat to secure the line. When you un-tie the line it should not come flying off the winch and yet the winch is not taking the strain. At least that is my take on it.
The cleat came with two rubber gaskets and we put a thin layer of silicone under the teak block to keep water from sitting under it.
 Now to get the cap rail to look that good.


Some of the teak if you look close at the bottom is dark and we would have needed to sand just too much off to get it back to looking new. The teak was just too damaged in some places. It still looks worlds different than before and the line just slides over it smoothly.


Last hatch installed! - Stateroom Bomar - Pompanettellc Hatch install - 2010

  
On Saturday it rained all morning so we were thinking of abandoning the Bomar - Pompanettellc Hatch install.