


We then discovered that this is the place we wanted the faucet and any other place did not work for us. Now how to get the hose in. We tried a lot of different methods and because the cabinet was only about 8 1/2" above the counter top and on top of the holes our options were limited. We did take a bus to Home Depot in Puerto Vallarta in hopes of finding some drill bits that fit our flexible drill bit holder but no luck. Another tool store and then we said the heck with it. We ended up using a drill bit with a pair of Vice Grips attached and did them all by hand.

First though, we needed to cut the extra piece of 3/4 plywood from underneath the countertop. This extra thickness was just too much to deal with. We used a Dremel with a cut off tool to accomplish this. Not an easy task but better than not doing it.

Not that I usually read'em but the directions for the faucet are in Chinese and no pictures! All Chinese to me any how 😁

Debbie putting the template under the countertop also.
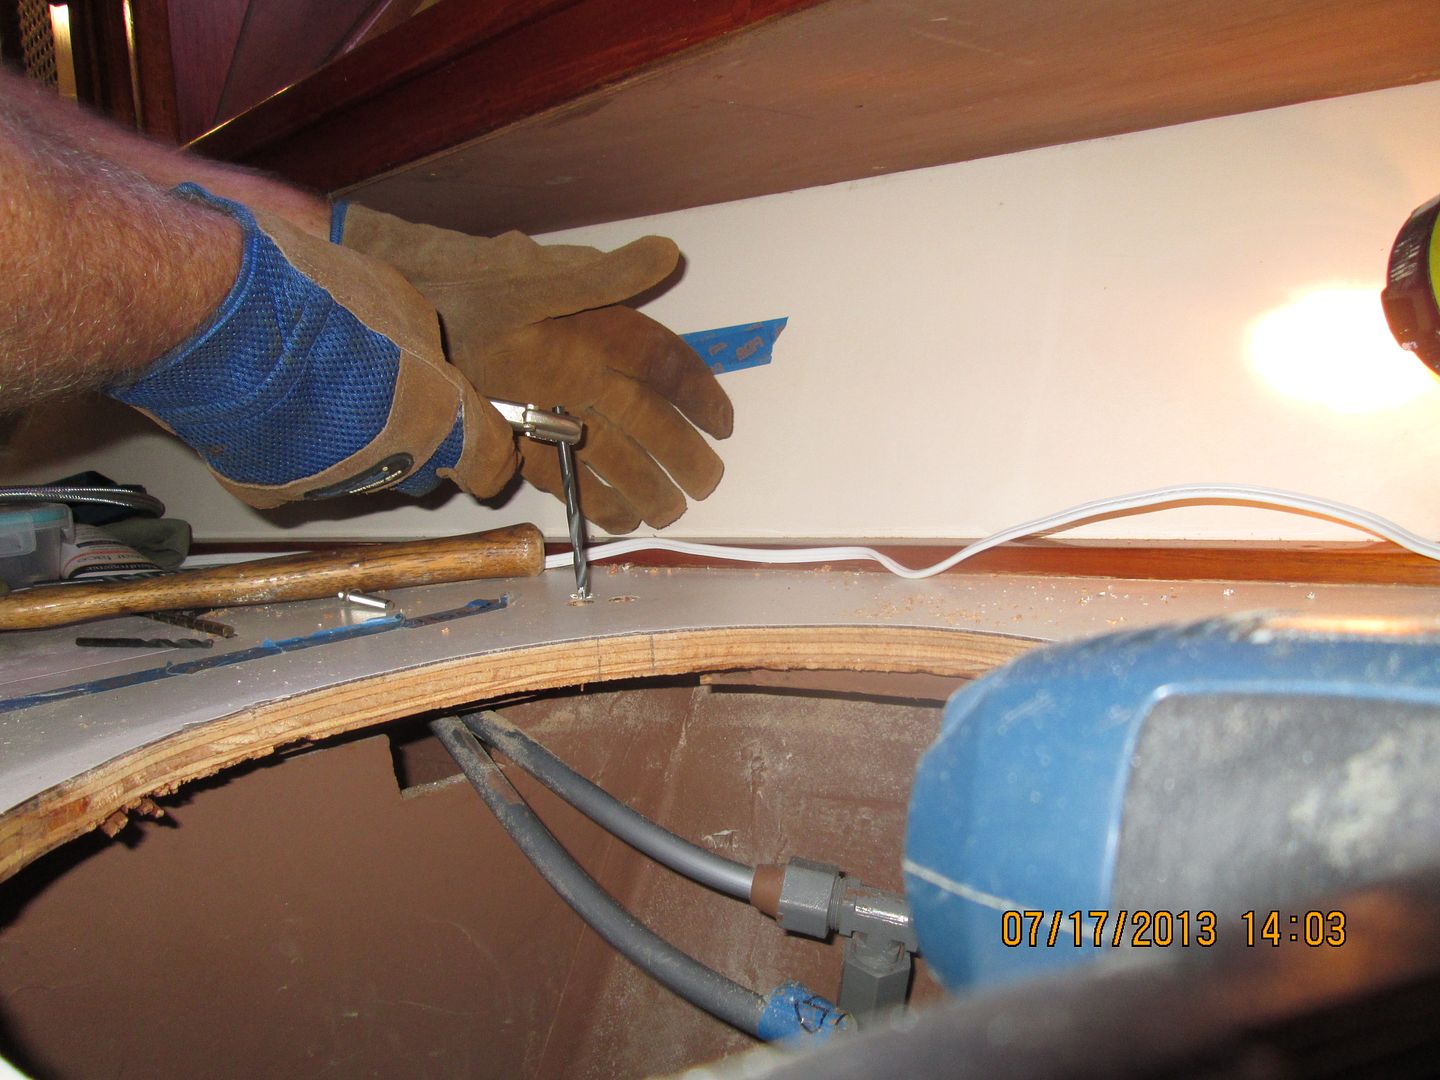
Drilling holes by hand.


Debbie screwing in the nuts on the faucet (small hands people).

You can see Debbie's hand doing the bolting. Also see the area cut out. That was extra plywood making the countertop way thick. The studs for the sink were not long enough for that thickness. While we could get longer metric studs (maybe...somewhere...not Home Depot, Puerto Vallarta- we checked!!) the hole drilling by hand was too much.


From this.

To this!
Head faucet demo
After I finish revarnishing the cap rail, changing the valves at both the head and galley are next. I'm not sure if I'm going to change the head sink like you did, but changing to a single control valve is a must. I never noticed the head sink didn't already have shut off valves, so I'll think about if I need to put those in or not.
ReplyDeleteTo bad you didn't have an angle drill for drilling out the hole for the fawcet, but I'll give you an 'A' for your effort in making it work...And that sink looks like it was a bear to get out. Is the new sink going to sit flush on the deck or isn't there enough room for that? I wish the galley drain had a drain line as large as the head does.
Don